When your oven breaks down, it can disrupt your entire meal planning. Whether you're dealing with a gas oven, a regular oven, or even a microwave oven, knowing how to handle simple repairs can save you time and money. This guide will walk you through essential steps for gas oven repair, general oven repair, and microwave repair, ensuring you're well-prepared to tackle common issues yourself.
Identifying Common Oven Problems
Understanding the problem is the first step in effective oven repair. Here's a look at common issues you might encounter:
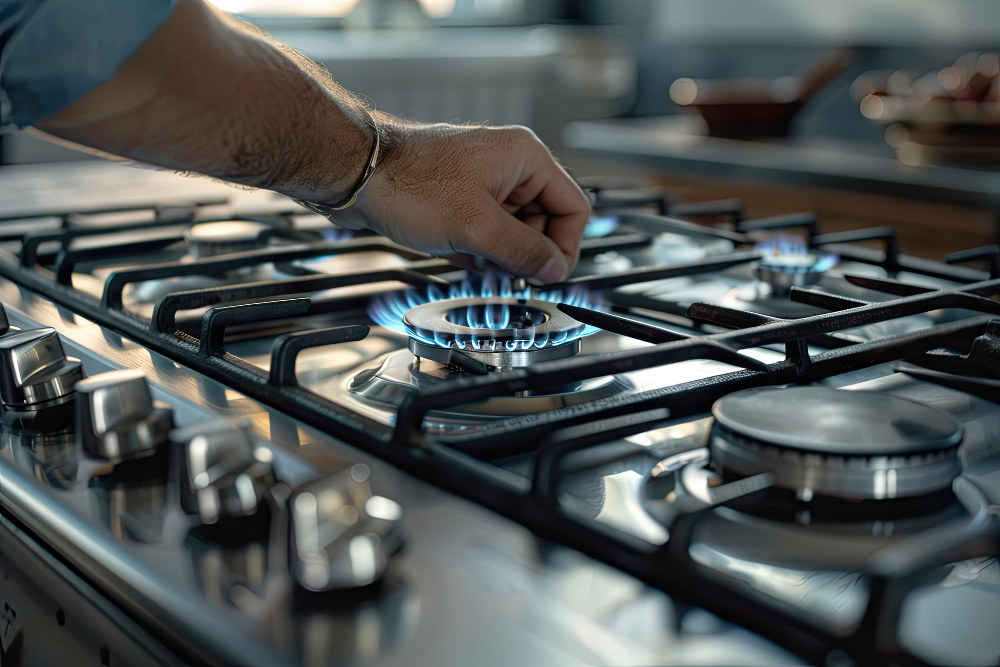
- Gas Oven Not Heating: If your gas oven isn't heating up, it could be due to a faulty igniter, a problem with the burner, or an issue with the thermostat.
- Uneven Heating: Uneven heating can result from improper rack placement or a malfunctioning heating element.
- Strange Noises: Noises such as popping or banging might indicate loose parts or a problem with the burner.
- Oven Door Won't Close: If the oven door doesn't close properly, it may be due to a damaged seal or a misaligned hinge.
- Error Codes: Modern ovens often display error codes that can indicate specific issues with components or functions.
- Foul Odours: Unpleasant smells, particularly gas odours, can signal leaks or burning food particles.
Essential Tools and Supplies for Oven Repair
Having the right tools at hand can make your repair job much smoother. Here's what you'll need:
- Screwdrivers: For removing and securing screws.
- Multimeter: To test electrical components and connections.
- Wrenches: For loosening and tightening bolts.
- Replacement Parts: Depending on the issue, you might need igniters, thermostats, or heating elements.
You can find these tools at your local hardware store or online.
Step-by-Step Repair Guides
Gas Oven Not Heating
- Check the Gas Supply: Ensure the gas valve is fully open. If it's not, turn it on and test the oven again.
- Inspect the Igniter: Look for signs of damage or wear. If the igniter isn't glowing, it may need to be replaced.
- Test the Thermostat: Use a multimeter to check if the thermostat is working correctly. Replace it if necessary.
- Replace Faulty Components: If parts are damaged, purchase replacements and install them according to the manufacturer's instructions.
Uneven Heating
- Check the Oven Racks: Ensure the racks are positioned correctly and do not block air circulation.
- Inspect the Heating Elements: Look for any visible signs of damage. If the elements are broken or cracked, they should be replaced.
- Clean the Oven: A dirty oven can affect heating. Clean the interior to ensure even heat distribution.
Strange Noises
- Identify the Source of the Noise: Determine if the noise is coming from the burner, fan, or another part.
- Check for Loose Parts: Tighten any loose components.
- Replace Damaged Parts: If you find any damaged parts, replace them to stop the noise.
When to Call a Professional
Some issues might be beyond DIY fixes. If you encounter any of the following, it's time to call a professional:
- Persistent Gas Leaks
- Complex Electrical Issues
- Major Component Failures
- Recurring Problems
- Inadequate Repair Skills
- Compliance with Codes and Regulations
Attempting these repairs with proper expertise could be safe. A qualified technician can ensure the job is done safely and correctly.
Safety First: Ensuring a Safe Repair Environment
Before diving into any repairs, it's crucial to prioritize safety. Gas ovens, in particular, require special precautions due to the risk of gas leaks and potential hazards.
- Turn Off the Gas Supply: Locate your gas shut-off valve and turn it to the off position. This step is critical to avoid any risk of gas leakage while you're working on the oven.
- Ventilate the Area: Ensure the kitchen is well-ventilated. Open windows and doors to keep fresh air circulating.
- Wear Protective Gear: Use gloves and safety glasses to protect yourself from sharp parts and cleaning chemicals.
Preventive Maintenance Tips
Regular maintenance can help prevent future problems. Here are a few tips:
- Clean Your Oven Regularly: Wipe down the interior and remove spills to keep the oven functioning well. This prevents grease build-up that can affect performance.
- Inspect Components Periodically: Check the igniter, thermostat, and other parts for signs of wear. Early detection of issues can prevent more significant problems.
- Perform Routine Checks: Ensure that all parts are secure and functioning correctly. Loose or damaged components can lead to more extensive repairs.
- Test the Oven's Temperature Accuracy: Use an oven thermometer to verify that the oven is heating to the correct temperature. This helps ensure even cooking and prevents overheating.
- Keep Vents and Fans Clear: Ensure that oven vents and fans are free from obstruction. Proper airflow is essential for efficient heating and cooling.
These tips help keep your oven in top shape and avoid common issues.
Conclusion
Understanding how to handle basic oven repairs can greatly extend the life of your kitchen appliances. You can effectively tackle common issues by following these guidelines for gas oven repair, general oven repair, and microwave oven repair. However, when in doubt, it's wise to consult a professional. At AMP Appliance, our experienced technicians are here to help with any complex problems, ensuring your safety and the longevity of your appliances. Call us at +1 (778) 834-7026 to get started.